Wednesday, September 28, 2011

Thander

Thander

Rest In Peace, sweet Thander-man. We love you.

Thursday, September 22, 2011

Experiments in Fiberglass

Fixer

Another project I want to share with you is a new costume piece we made for Scott for Dragon*Con. The costume is of a character from Marvel Comics Thunderbolts, named Techno. As you can see, this costume has some large, heavy, awkward pieces. This year, we remade them so that they would be lighter, more resilient, and less painful.

The new shoulder pieces were built by making a mold of the old one and using fiberglass to create a strong new skin that doesn't require reinforcement -- just foam. Plus, the new pieces have lights installed.

Fiberglass for Fixer suit

Unfortunately, we started the fiberglass before we really knew how to do it, so that created a lot more work for us. You can see this from the random strands of fiberglass sticking out in the photo above. Not knowing how to apply the fiberglass meant that we had to apply more coats, cut off sharp parts, fill in holes on the outside, and a lot of sanding.

The first thing to know before you start is that there are two different ways you can buy the fiberglass reinforcement.

Fiberglass batt

The batts shown above are full of fibers that are scattered in random directions, and are not adhered together. You can pull the fiberglass batt apart, not unlike a batt of roving for spinning wool. Bits of the batt sticking to our gloves were the cause of the all of the spindly sharp bit in the picture above.

Fiberglass cloth

The cloth shown above is much cleaner and in many ways easier to work with, but it flexes in a different way from the batt, and the shapes must be pre-cut.

These number of sharp spots lessened as we realized that it was easier to work with once we smothered it in resin. Still, we couldn't get things right until we finally did what we should have done in the first place -- called for advice. I knew that my mom had made fiberglass sculptures in college, so we asked her for tips. Everything she said made so much sense, and then it was confirmed when we talked to her neighbor, who has used fiberglass to make bathtubs, etc. Here's what we learned:

You have to remember that the fiberglass is just an armature and the really important material is the resin, so you need to focus on the resin. You want to pour the resin into the mold so that it's thick, like spreading honey. The resin coat you apply should be thicker than your fiberglass. You will then set the fiberglass onto the coat of resin and it will sink down into the resin and be swallowed up by it. We had coated the mold with only a small bit of resin before adding the fiberglass, which ultimately led to voids between the mold and the fiberglass that we laid on top. Plus, the fiberglass became totally unmanageable, sticking to our gloves, etc., because it wasn't fully soaked in the resin.

You want to work in small areas and move from one to the next, rather than trying to get an entire coat done in one shot. The size of these areas should be about 6"x6" and that should decrease if there is a tight radius. You don't want the resin to dry entirely, but you can let it set up a little. It will work and there won't be a seam as long as the part you're working on is touching a part that's not dry yet. This is like the way that painters have traditionally made frescoes. Doing this would have allowed us to turn the piece to get into areas that are completely opposite each other without having the resin run and pool.

Kale Chips

Kale Chips

We missed last week's Cocktail Wednesday because of Scott's heavy workload. I wanted to share something else with you instead that I made last week and took to Scott's brother's housewarming party. From the bounty of our garden, I harvested kale and made chips, using a recipe from Oui Chef Network. They are lovely, thin, crispy veggies-ful chips. I had read that they were like potato chips, and therefor, at first, I found the flavor too strong, but once I started eating them the second time, I really started enjoying them. I got lots of compliments and several requests for the recipe. Even several picky anti-veggie guys liked them!

Kale Chips:

1 large bunch kale
a few glugs of extra virgin olive oil
Kosher salt to taste

Preheat your oven to 300ºF, and evenly distribute the racks inside.
Wash and dry the kale, first in a salad spinner, then by laying it between layers of fresh kitchen towels or paper towels so you get it as dry as possible.
Remove its tough center rib and cut the remaining part of each leaf into manageable pieces. Toss them into a large mixing bowl with a few glugs of extra virgin olive oil and a generous sprinkling of kosher salt. (At that point it will look like the photo above.)
Bake on sheet pans in a single layer, and bake in the oven for 15 - 20 minutes until crispy. If you don't have enough pans or racks, you'll need to cook them in batches, but 15-20 minutes is fast!

Cocktail Wednesdays: The Gory Kraken

The Gory Kraken

Yesterday, I harvested a lot of strawberries, and I wanted to use them in the evening's drink. I didn't want to go for a strawberry daiquiri. The other requirements, just based on what Scott was in the mood for included: no lemon juice and no vermouth. We were also looking at rum or gin drinks.

I thought about trying a Strawberry Mojito, but Scott wasn't so sure about combining mint and strawberry. Plus, I don't think he wanted to mess with the mojito, since it's one of his favorite drinks.

I took some inspiration from The Strawberry Haze and The Champagne and Strawberry Cocktail that I found on Made Man, but I didn't want to crack a champagne bottle. Instead, we decided to go for spiced rum and strawberries. The result of the unstrained strawberry pulp floating in the spiced rum certainly looks like an appropriately Pirate-ish drink to be associated with the Kraken, and the rum is a strong component but it's also fruity.

The Gory Kraken

1/2 tsp sugar
4 strawberries
2oz spiced rum
1 Tbsp simple syrup
1 dash white balsamic vinegar

Muddle the strawberries in the sugar. Add rum, simple syrup and balsamic vinegar. Shake over ice and pour into a rocks glass.

The verdict: I tasted this throughout the process of creating the drink, so I was pretty pleased with the result. Scott thought it was good, too. I think it's a nice balance of the the strawberry and the flavor of the rum, with a little twist from the balsamic to keep it from being too sweet. I started with half the simple syrup, and I wasn't sure I wanted to double it. I could have used a scant tablespoon that would be a tiny bit less sweet. The splash of balsamic also needs to be tiny, and that can be hard not to over do. It should just temper the sweetness, and give a tang, not be enough to be identifiable. The amount should be similar to a couple of dashes of bitters.

Wednesday, September 14, 2011

Homemade Ricotta

Ricotta Making - with cat

In things I have been planning to blog about, I made ricotta from scratch at the end of last month. I had a gallon of raw whole milk from some friends who bought a share at a small local dairy for the summer. They went to Burning Man, and I got their last gallon of milk. I had to use it quickly, before it went bad, and before we left for Labor Day weekend in Atlanta. I decided to make some cheese.

I had made cheese before, using a kit my mother bought from New England Cheese Making Supply Company. We made mozzarella, then we made ricotta from the whey. I found that I couldn't make mozzarella on the spot, though, because I had no rennet, so I decided to make an extra-rich ricotta. I was excited about using the raw cheese, because it was organic, and the organic milk I can normally get at the grocery store is ultra-pasteurized, which denatures the proteins, and makes it unsuitable for cheese making. I had a recipe from Smitten Kitchen that was even richer, since it includes heavy cream, but I didn't quite want to go that route since it seemed even farther from the traditional ricotta, and since this milk was extra-rich. This recipe was also for much smaller quantities of milk. I decided to do some more research and combine that recipe with others, especially after adding up the amount of lemon juice I would be using. I also used a recipe from About.com's Italian food section, a step-by-step tutorial from Wikihow, and information from The Food Lab. I found The Food Lab's comparisons to be especially helpful. I also have a recipe somewhere from a friend of Italian descent, but I couldn't find it at the time.

Ricotta Making

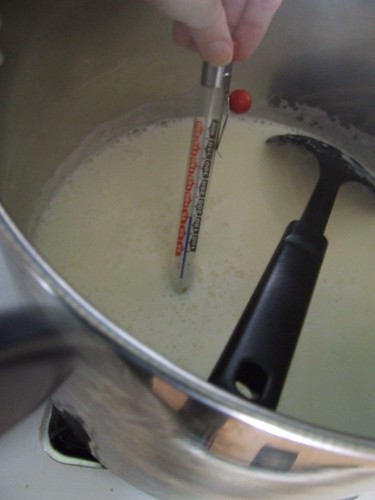
The first step to making ricotta is to heat the milk to the point at which it starts to simmer, 180ºF. My first recipe said a higher temperature, but according to the testers at The Food Kitchen, any temperature in the 165-185ºF rage works without noticeable difference. Also, note that although I was using raw milk, I raised it above 161ºF, which is the temperature at which milk is pasteurized, so I had no worries, even if I hadn't felt as confident in the milk's origin.

Once the milk is hot enough, it is removed from the heat and the acid is added. I chose to use distilled white vinegar because The Food Kitchen said it "gave the cleanest flavor, with soft, tender curds", and it was the most consistant. Once I had stirred that in, I added the salt. The curds began forming immediately.

Ricotta Making

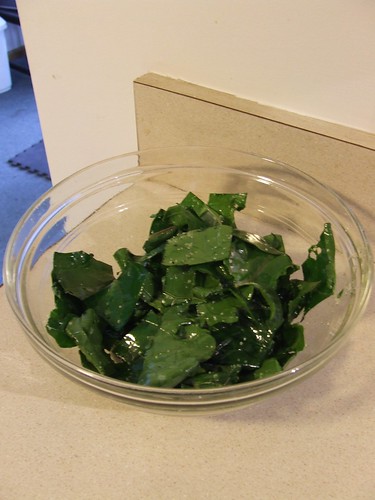
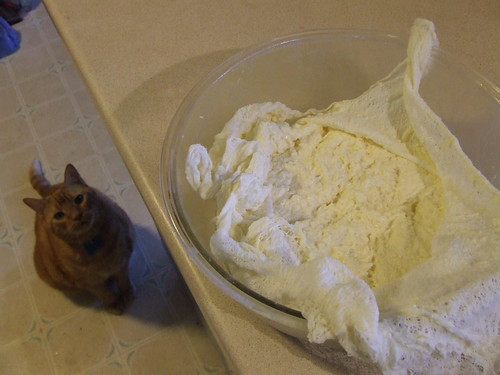
After letting it sit and form curds for a little while, I dumped it into a colander lined with several layers of cheesecloth (Since I didn't have butter muslin) and let it strain into the bowl below. This wasn't the best way of doing it, because the draining took forever.

As you can see in the above picture, the whey was still pretty rich. In fact, it was richer than the whey I used the first time I made ricotta, after making mozzarella, so I decided to use it again, until it got thin. In the later batches, I added less vinegar.

The second time, I spooned the curds out of the whey, which was much more effective and drained much more quickly.

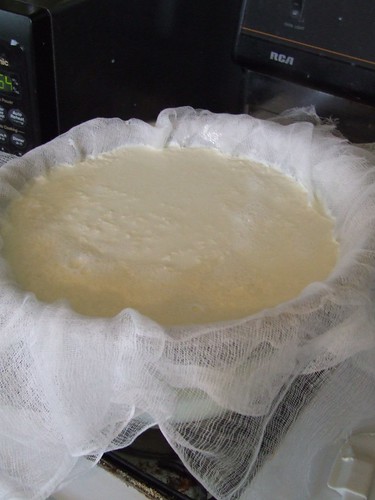
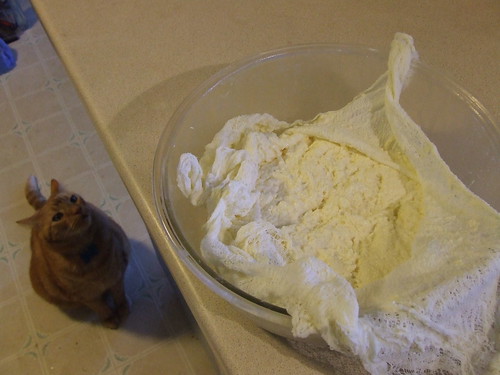
Here's the final product complete with dramatic lighting:

Ricotta Making

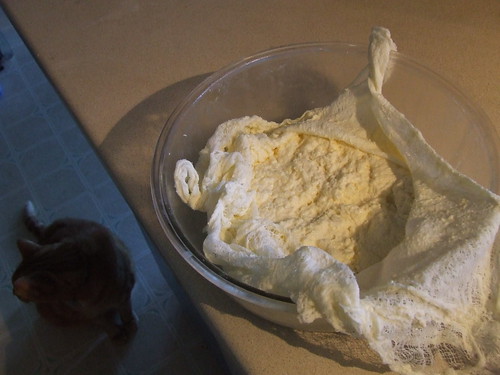
And here it is where you can see how intriguing Hoser finds it:

Ricotta Making - with cat

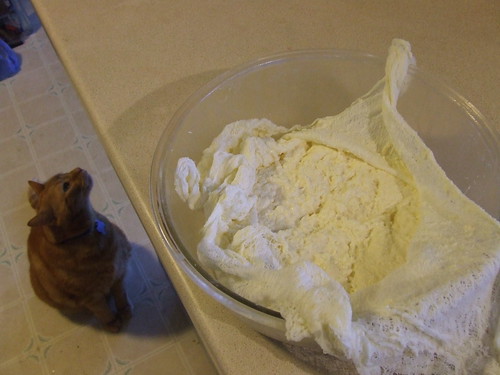
Either that, or he was just being a little furry diva:

Ricotta Making - with cat

Ricotta:

1 gallon milk
1/3 cup plus 1 teaspoon distilled white vinegar
1/4 teaspoon salt (more if you want a saltier taste)

Heat the milk between 165ºF and 185ºF, or the point at which it starts to simmer.
Remove from heat.
Gently stir in vinegar.
Add salt.
Allow to sit and curds to form.
Ladle curds into a colander lined with cheese cloth, over a bowl to catch excess liquid.
Allow to drain for at least 15 minutes, until it reaches desired consistency.

Continue to process your whey until it runs clear, addling less acid in each subsequent batch, and just mix the curds together.

I used the ricotta in lasagna. I also ate some fresh. It was fabulous. In retrospect, I should have made something that would have shown it off a little better, like ravioli, but it was still good. Honestly, it was pretty easy, too.

Thursday, September 8, 2011

Cocktail Wednesdays: James Joyce

James Joyce Cocktail

Last night's drink was the James Joyce. The cocktail is, as you might imagine, an Irish whiskey based cocktail. Personally, thinking of the Irish author James Joyce makes me think of Finnegan's Wake. I've never read the book, but I do know the Irish street ballad that inspired it. In the ballad, when whiskey spills over Tim Finnegan's apparently dead corpse, he wakes up. The word whiskey comes from the Gaelic words for water of life, which James Joyce apparently found fascinating in the context of this ballad.

Of course, the cocktail isn't just a glass of whiskey. It's a sour, which appears at it's base in the Whiskey Sour, which is whiskey, citrus (lemon or lime) and sweetener. More specifically, the James Joyce is a New Orleans Sour, which means that the sweetener is an orange liqueur rather than something non-alcoholic, such as simple syrup or runny honey. We've already tried one, the Sidecar, and you're likely familiar with another, the Margarita.

James Joyce Cocktail

The James Joyce:

1.5 oz Irish Whiskey
0.75 oz Sweet Vermouth
0.75 oz Orange Liqueur
0.50 oz Lime Juice

Add all ingredients to a mixing glass
Shake with ice and strain into a coupe

The verdict: We both liked this a lot. The vermouth presence was very low, and it took a back seat to the other flavors, but I do think it adds some depth of flavor. Since Scott's favorite two spirits are Irish Whiskey and Grand Marnier, this was a good combination for him. Also, the lime seems to be less acidic and more palatable for him. That makes this drink another good step in figuring out what will be more likely to work for us.

Saturday, August 27, 2011

Cocktail Wednesdays: The Jack Rose & The Bronx

I have been remiss in my cocktail update duties. I have missed a full three weeks of cocktail posts. It all started when I went out with the girls for a bit of hanging out before Scott's cousin's wedding. I got home late, and forgot to get pictures of the Manhattans we had using the Maraschino cherries I made. I was planning to make another and talk about it, but my inertia has really set in, so I had best skip it and get on with it.

The Jack Rose

Last week was The Jack Rose, which is a traditional apple brandy or applejack-based drink. There were several different recipes I considered, and the ultimate selection was based on what was available. The limes I had planned to use had turned, so we had to go with a lemon juice recipe. I ran out of grenadine as well, so that aspect was closer to some of the other recipes.

The Jack Rose:

2 oz Calvados or Applejack brandy
1 oz lemon juice
1/2 oz grenadine syrup

Shake with crushed ice and strain into a cocktail glass.

The verdict: It was rather pink, not the deeper color of the Esquire photo. It smelled rather like cleaning fluid. The taste was much better than the smell, though it was too acidic. I could detect the apple and the fruitiness of the grenadine. I think I'd like to try it with lime and a different amount of grenadine, and this may not have been the best calvados, but in this state, it isn't a drink I would choose.

The Bronx Cocktail

This week was The Bronx Cocktail, which was a major staple of prohibition, and the basis of many variations.

The Bronx Cocktail:

2 oz gin
1 oz orange juice
1/2 oz dry vermouth
1/2 oz sweet vermouth

Stir over cracked ice, strain into a chilled cocktail glass.

The verdict: The vermouth was the main flavor of the Bronx, and neither Scott nor I are big fans of vermouth. Given the proportions, it doesn't seem that it should be so strong on the vermouth. I am interested to try this with a gin with a stronger flavor profile, and fresh orange juice. That just might do the trick.

Thursday, August 11, 2011

Week in Review

So, what have I been doing in all of this time that I haven't posted?

Scandinavian Cardigan

I knitted my Scandinavian cardigan up to this point, when I seem to have run out of the main yarn. I may have more of it hidden in my stash somewhere, because I thought I had enough, since I had seven seemingly large balls, but either I misplaced some, or I needed more yardage than I thought. I can easily just finish the ends of the sleeves and the bottom of the body in black, but I don't really want to work with the remaining black yarn because it was very damaged. I don't know if this was a yarn quality issue or a result of the fact that this yarn was the oldest in my stash, but for the moment, I have put it to the side, and started a project with my next-oldest yarn.

Random stripe knee highs

These will be randomly striped knee-high socks in plain stockinette, or possibly with a ribbed leg. I am using dice to determine the striping pattern and stripe size. I am carrying the other colors up the sides, and I am knitting two socks at a time, pulling from either end of each ball, so things are getting a little tangled, as you can see. It isn't a real problem yet. I do need to check my technique for carrying up the sides. I'm not sure if it's right. It seems messier than it should be.

Other things I've done lately:

Fresh Bread

Baked bread

Heirloom Tomato

Finally getting to eat local heirloom tomatoes from the neighborhood fruit stand.

Japanese Black Trifele Tomato

The first ripening tomato in our garden is still on the vine. It's my favorite variety, Japanese Black Trifele.

Belle Isle Beach

On Saturday, a friend and I went to the beach on Belle Isle. This is her photo from a previous visit. The day we went was overcast, and we just waded deep in the river rather than actually swimming. I was really impressed by how clear the water is. It's not muddy like the Chattahoochee. I could see the minnows nibbling at my toes! The water was a lovely temperature as well.

After that, we went to B. Nektar Meadery for their annual anniversary event. We tasted mead, mixed drinks made with mead, ate hot dogs from Detroit Underdog, ate home-made ice cream from Treat Dreams, and listened to bands. The mead at B Nektar was my favorite at a tasting event last year, so I was excited to check out the event. It was just an extra bonus that Treat Dreams even had salted caramel ice cream on hand, like Morelli's.

Sunday, we had a great time at a friend's birthday/housewarming, and we got to chill in their pool. I brought them fresh baked bread and salt, for a blessing, and I have received lots of compliments since they've tried it.

Monday, I helped Scott's cousin with wedding preparation. I also taught reels of four at dance class.

Tuesday, I dealt with some of the craziness that is our veggie garden.

Garden

Garden

The squash has really overgrown its bounds.

Garden

Not only is it out of its bed, it's into others.

Long Island Cheese Squash

The pumpkin-like squash is taking over the fence.

Thelma Saunders Squash

I'm not cutting them back, though, because they are fruiting in those areas.

Detroit Dark Red Beet

The Detroit Dark Red Beets are a success, and seem to already have beetroots the size of my fist.

Japanese Black Trifele Tomato

The Japanese Black Trifele is the first tomato to ripen.

Amish Paste Tomato

The Amish Paste tomatoes are bearing fruit as well.

Basil

Basil is prolific.

Garden

Sunflowers are growing as stakes for burgeoning pole beans.

Additionally, I am harvesting bush beans and small eggplants, cucumbers and melons are flowering, and the borage is having a field day.

Tuesday, August 9, 2011

Cocktail Wednesdays: The Cooperstown Cocktail

The Cooperstown Cocktail

Once again, I have let time get the better of me, and I am very late in posting last week's cocktail. I chose the Cooperstown Cocktail, with the thought that it should be a refreshing, minty version of a martini, and I would get to try the orange bitters for the first time.

The Cooperstown Cocktail:

1.5 oz Gin
0.75 oz Dry Vermouth
0.75 oz Sweet Vermouth
2 dashes Orange Bitters
2-3 Mint Leaves

Add all ingredients to a mixing glass
Gently shake with ice and strain into a coupe
Garnish with a sprig of mint


The verdict: The dink blended nicely, thanks to the orange bitters. The flavors flowed smoothly from the gin to the mint to the vermouth. It was definitely too heavy on the vermouth for both Scott and I, but that's not too surprising, considering it's half vermouth. I think I might even like it if the proportions changed just a little.

Monday, August 1, 2011

Maker Faire Detroit

Maker Faire Detroit 2011

The reason the last post was so late was that I have been busy. Thursday and Friday I volunteered to help set up Maker Faire Detroit in exchange for a couple of free tickets. I helped with Maker check-in and with setting up the Maker Shed. Set up was exhausting, and I didn't have much energy left on Thursday. Friday was more exciting because I got to meet a lot of interesting people and see more of the things they were presenting. Plus a friend and I hung around for the Maker mixer party. Make: Live filmed some of what was going on at the faire at that point, and you can see us in red shirts in the background.


Saturday was the day we attended the faire. Here are some photos of the things I captured before my camera died.

Maker Faire Detroit 2011

Maker Faire Detroit 2011

Maker Faire Detroit 2011

Maker Faire Detroit 2011 - Edison's stock ticker

Maker Faire Detroit 2011

Maker Faire Detroit 2011

Maker Faire Detroit 2011

Maker Faire Detroit 2011 - Circ Amongus

Maker Faire Detroit 2011

Maker Faire Detroit 2011 - Early Engine Club

You can see more photos and videos here. Some of the makers that caught my eye, or my taste buds were:

Charteuse Organic Tea, who makes fabulous caffeine-free herbal teas. My favorite was the Mountain Green.

Cheese from Traffic Jam & Snug

Willowbrook Farm Spices and Heirloom Seeds

The Cultured Cook taught me about oils

i3Detroit, OmniCorp Detroit and TechShop provide shared spaces, tools, equipment and even classes for people to make things.

Second Life Foundry welds cool things from salvaged materials.

MakerBot Industries brought new 3D printers with much higher resolution. TechZone Communications and RepRap brought open source 3D printers, many of which had parts made by other 3D printers. Shapeways will print your 3D designs for you, using many different materials, from plastic, to silver, to stainless steel, to glass.

TFB Plastics and Smooth-On should help us with perfecting some of Scott's costumes. The 501st showed some in-progress Storm Trooper suits.

Other things I enjoyed seeing were: The Coke & Mentos Fountain, The Life Sized Mouse Trap, The Power Racing Series, The Waterfall Swing. There was all kinds of cool stuff from science, to craft, to performance.