Showing posts with label sewing. Show all posts

Monday, September 17, 2012

Piping in spandex

Installing Piping

For my Black Widow costume, where I was basically replicating Scarlett Johansson's costume from Iron Man II, I needed to add piping at all of the princess seam lines. At first, I tried to make the piping before inserting it into the suit, and I found that did not work very well. This is probably partly because I didn't own a piping foot at the time, but I also found much more success when I did it a little differently, following a tutorial on how to pipe stretch fabrics.

Installing Piping

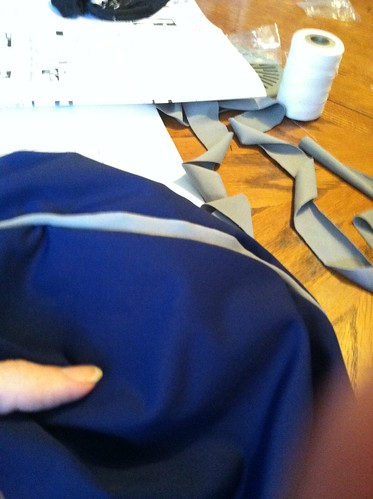
First, I cut strips of the fabric I wanted for the piping. I sewed these strips to the main fabric, exposing a width of fabric equal to the circumference of the elastic cording was using as the center of the piping.

Installing Piping

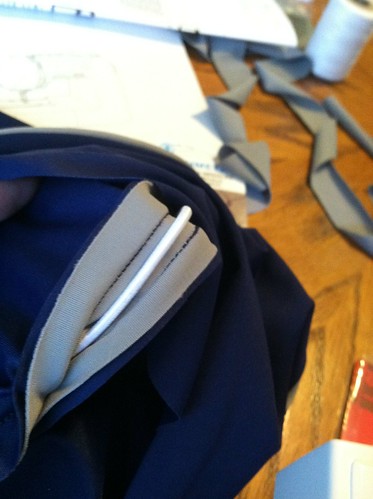
I laid the cording inside this gap and folded the seam allowances of the main fabric together.

Installing Piping

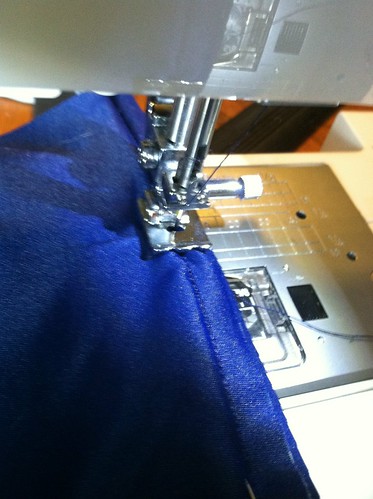
Finally, I got a glorious piping foot and sewed along the seam line at the regular seam allowance width.

Installing Piping

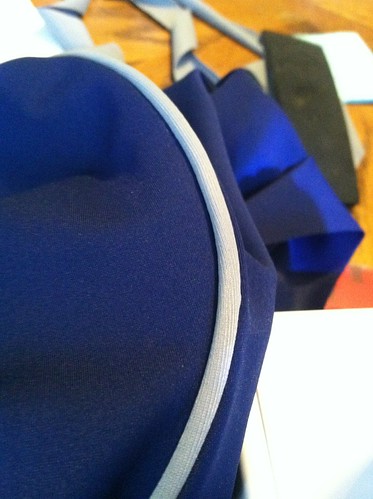
All of this resulted in a beautiful piped seam.

Catching up post Dragon*Con

Sorry it has been so long since I have posted.  I have no real excuse, only pseudo-excuses like "I was out of town"  and "then I was sick", but I have some things I want to share with you from my trip, and I really wasn't that sick.

As with last year, we scrambled to finish our costumes before heading off to Dragon*Con.  This year was particularly bad, as we didn't finish up until 2 am, after pulling an all-nighter preceded by days of intense work, not to mention the previous time spent sculpting.

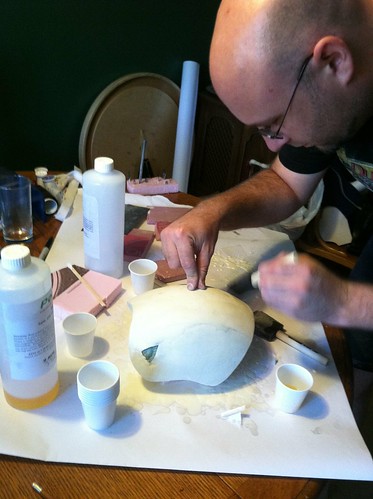
Sculpting the form for the mask

After much trial and error, Scott found that the best way to make a the kinds of forms he wanted for vacuum forming a plastic helmet was to carve them out of insulation foam, then coat them in a few layers of resin.

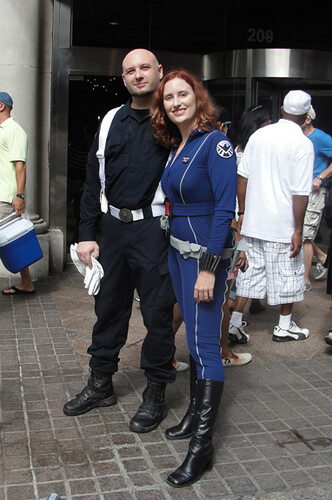
Agents of SHIELD

Meanwhile, I sewed a full suit out of spandex for my Black Widow costume, and I made the pants and added panels to the shirt of Scott's Irredeemable Ant-Man costume.

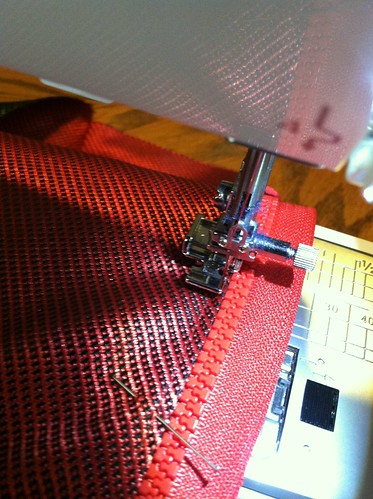
Installing a zippered fly

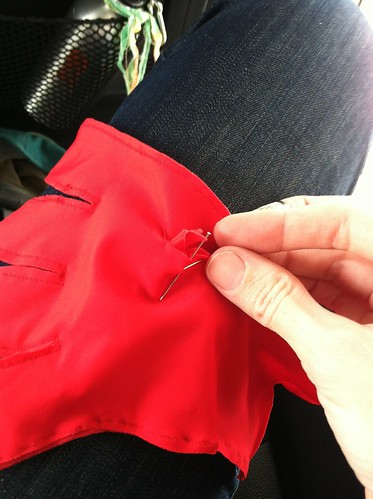
Above, you can see me sewing the fly into the pants - an undertaking which I personally always find confusing. Below is a photo of me sewing the thumb into a glove in the car on the drive down.

Stitching in the Car

Ant-Man

After a coat of paint and a hair dye job in the hotel room, our costumes were done.


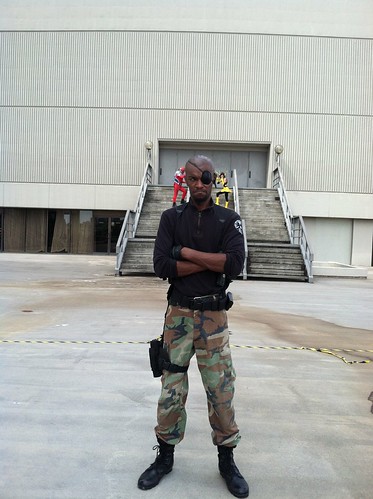
Nick Fury with Ant-Man and Wasp

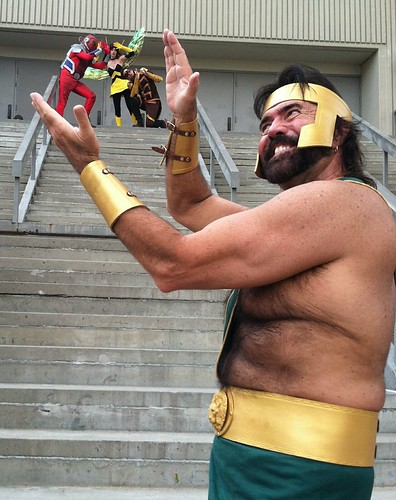
We managed to get some really cool forced-perspective shots with Scott in the Ant-Man costume. A few other shrinking superheroes got in on the action as well.

Hercules Crushing Ant-Man and Wasps

They'd be a bit better with a little editing of the backgrounds, but they're pretty fun just the same.

We had a good time overall, wearing our costumes, going to panels, dancing at concerts, and hanging out with the six friends who came with us, and the friends and family we saw once we got there.

Friday, February 24, 2012

Scandinavian Cardigan Finished

Scandinavian Cardigan - installing the zipper

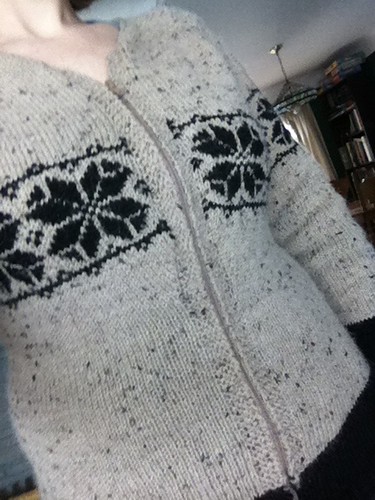
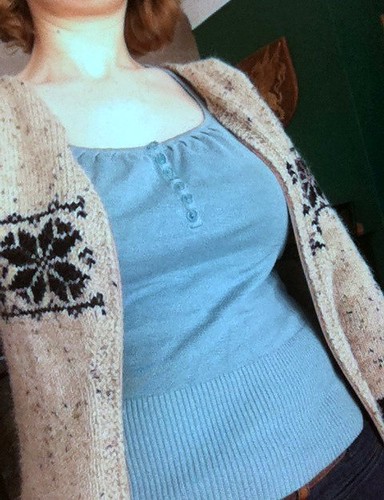
This week, I managed to finally work past my aversion to hand sewing and install the zipper in my scandinavian colorwork cardigan. I've worn it several times, intending to photograph it, but when I finally got to it today, my camera batteries were dead, and we have no additional batteries left. Therefor, please forgive the iPhone photos. I think that if I don't go ahead and post it, it will never get done.

Scandinavian Cardigan - installing the zipper

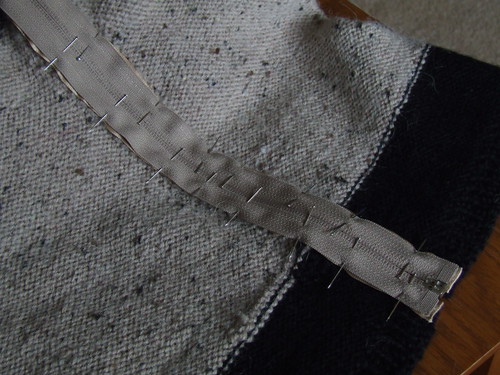
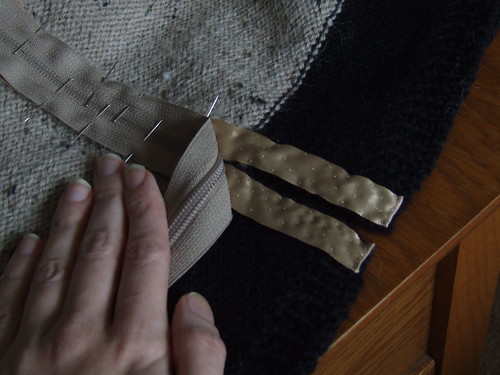
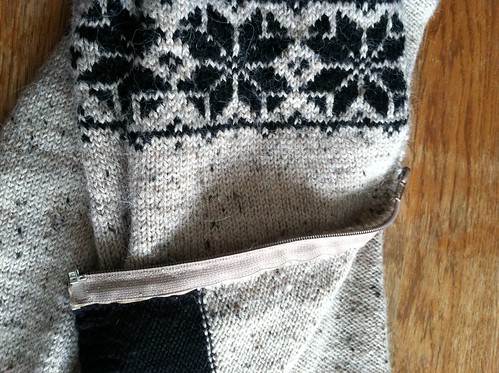
I think that with hand knitting, it's really best to hand sew in zippers, because I'm afraid the garment could easily get deformed and stretched unevenly while sewing on the machine. I even attach a ribbon on each side of the opening as a stabilizer before adding the zipper. I sewed two lines of catch stitch on each length of ribbon to secure it.

Scandinavian Cardigan - Zipper installation

On the zipper itself, I sewed a line of catch stitch and a line of backstitch right next to the zipper teeth.

Scandinavian Cardigan

Now, it's ready to be worn, but I may finish it later with another layer of ribbon over the inside of the zipper.

Scandinavian cardigan

I designed this cardigan using the Classic Raglan Cardigan formula from Barbara Walker's Knitting from the Top and stranded colorwork patterns found in Traditional Scandinavian Knitting by Sheila McGregor.

Tuesday, February 21, 2012

Steampunk Petticoat

Steampunk Petticoat

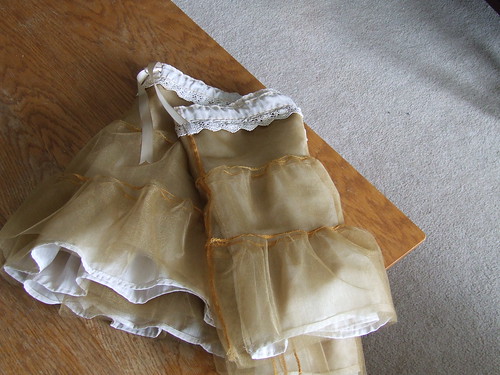
Just the other day, I finished a project that was on my goal list last month, and has been in my stash for a while -- a steampunk petticoat.

Steampunk Petticoat - detail

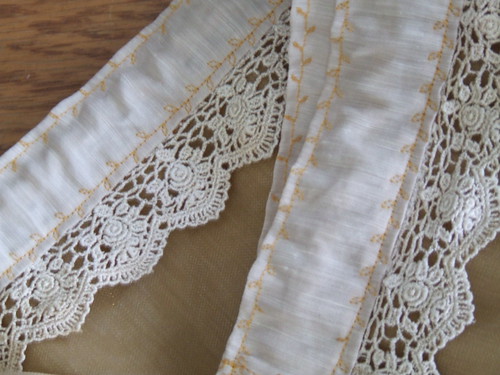
This project was involved a lot of sewing detail. Each seam was sewn multiple times. I made french seams on the woven oatmeal fabric, and overstitched them with a decorative vine stitch that is pre-programed in my machine. On the tulle, I overcast stitched all of the seams, then sewed them down. I actually thought that the back side of the overcast stitch looked almost like a decorative lace, so I chose to face that side out. Thanks to my detailed finishing, and the way I made the buttonholes for the waistband tie, the petticoat is reversible. The side you see in the pictures above emphasizes the construction and inner structure, and the other side has a little contrast stitching to keep the solid fabric interesting.

Tuesday, May 17, 2011

River Nile Dress

River Nile Dress

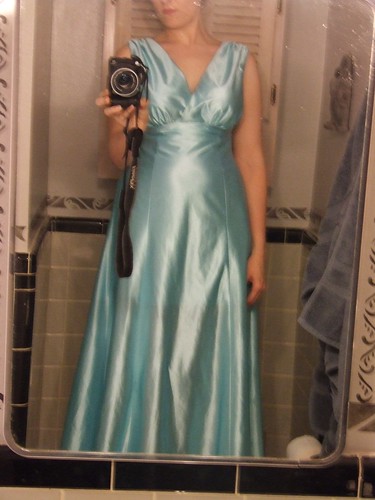
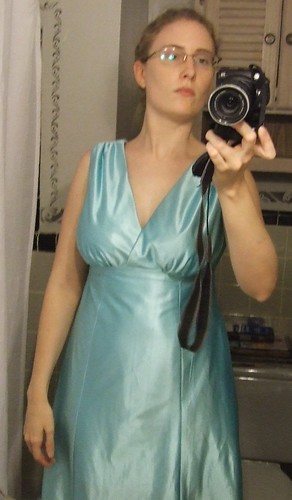
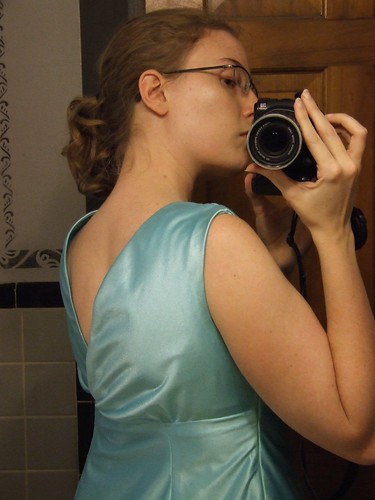
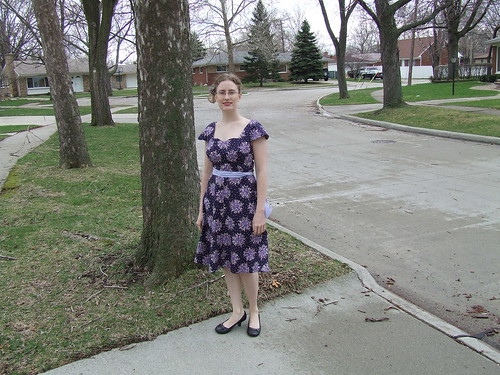
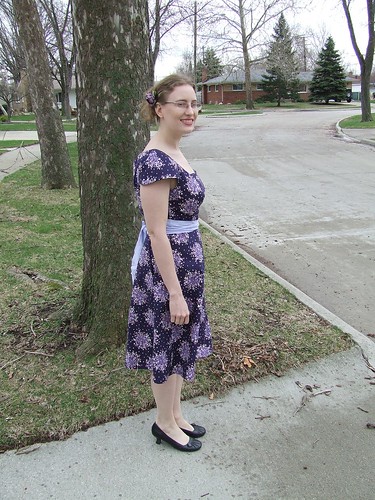
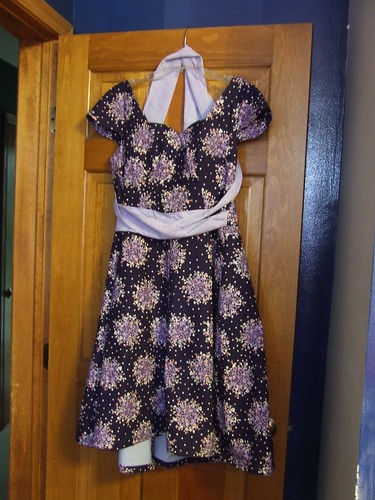
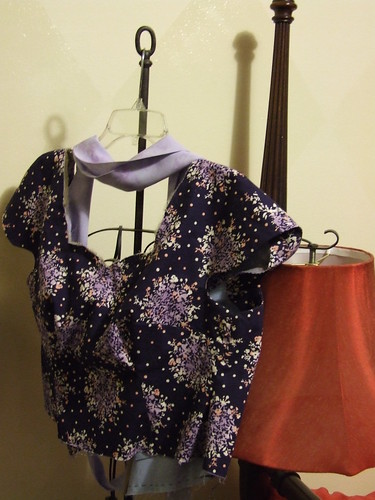
I mentioned before that I was working on a dress. I am trying to sew up some of my stash fabric, and I decided that the nile blue mystery fabric with the fabulous drape (it's a bit more green in person) would pair nicely with Vogue V8285, which was also in my stash. I had already made a dress using this pattern, before I learned how to fit clothing properly. This time, it came out better -- just how I wanted it, without futzing the seams or ripping like a mad woman. For you sewists out there, I added 1 1/4" to the bodice pieces at the neckline for a modest overlap that hides my bra.

River Nile Dress

River Nile Dress

I added gathers at the back to deal with the extra fabric below my shoulder blades, to mimic the front, but I think darts would have been more successful.

River nile dress - stabilizing

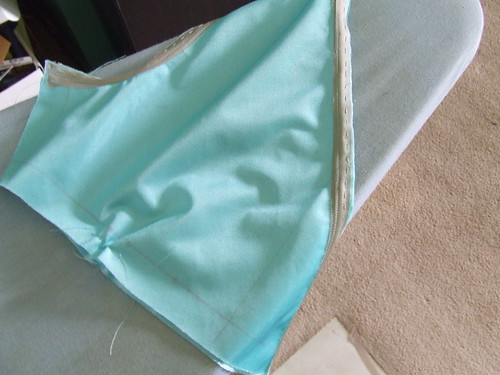
I spent some extra time adding bias silk organza strips to stabilize the neckline and armscye, like I used on the sleeves of the Crepe dress. But these strips stared out 3/4" wide, before stretching.. I also hand-understitched these openings and hand slip stitched the skirt lining in.

I started hemming by hand, but ultimately used my machine's blind hem stitch for the first time. I learned that I should have turned the hem up more than 1/4" before turning it fo the final hem. I hemmed it up a whole 3 1/2" the second time, because I want to wear it for dancing. In fact, I decided to finish it so that I could wear it to the ball in Ann Arbor on Saturday. Dresses for serious dancing require much shorter hems to prevent tripping or being stepped on. Floor length is a no-go. I went ankle length, but I wanted to preserve the ability to let the hem out, which is why I made such a deep hem. This was a bit of a pain, because it required a lot of steaming to ease in the extra fabric. The final result was worth it, though. It worked beautifully at the ball, too.

Saturday, April 16, 2011

Crepe Sew Along: The Finished Product

Crepe Dress

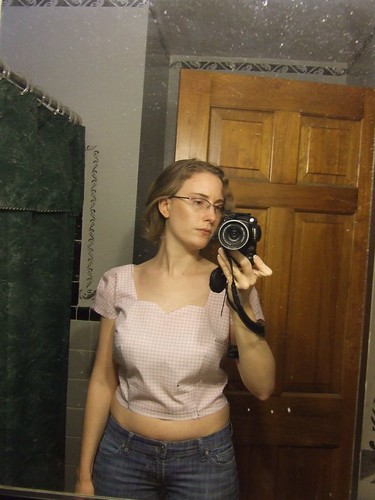
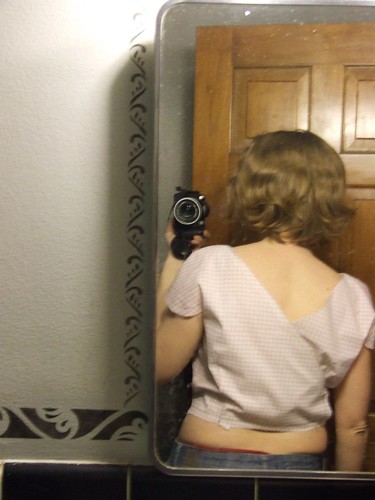
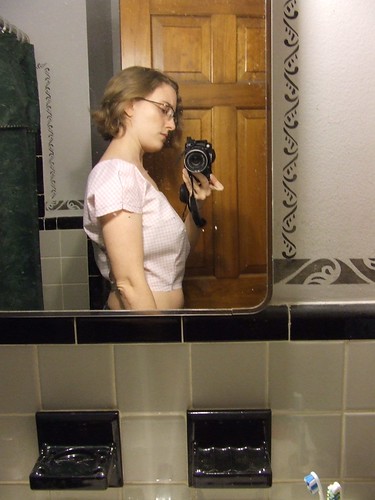
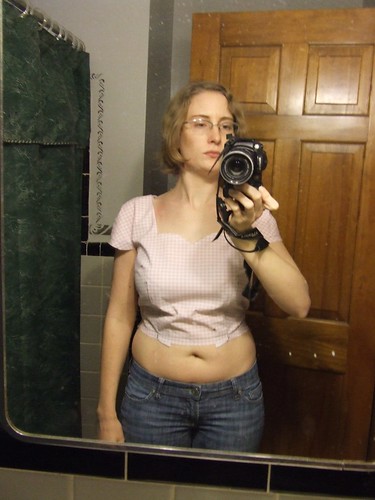
Here it is! I finally got some photos to share of my finished Crepe dress. They aren't the most glamorous photos, and the day is grey, but you can see how well the dress fits, at least.

Crepe Dress

Crepe Dress

I got lots of compliments on it today.

Monday, March 7, 2011

Crepe Sew Along 7: Finished Dress

Finished Crepe

Here it is -- the finished dress.

I hope to get Scott to help me take some "photo shoot" photos later in the week, so I can show off how well it fits.

Thursday, March 3, 2011

Crepe Sew Along 6: Sewing the bodice

Crepe bodice progress

I have progressed a good deal on the bodice of my Crepe dress. As you can see above, I am getting close to being done with the bodice.

First, I sewed the darts . I was hoping that the inside would be as neat and lovely as the outside, but the dart step burst that bubble for me. I had to sew some seams twice because my lines weren't totally straight, or accidentally went inside of a basting stitch or two. Sewing a proper line for the dart was actually more difficult because the darts are shaped, so I couldn't use the trick from Threads magazine's video. Plus, I sometimes forgot to adjust my stitch length at the dart point, or to adjust it back before the next dart. Still, when I pressed it all out, it looked lovely on the outside.

Next, I sewed the shoulder seams, pinked and pressed them open. Gertie recommended pinking for this seam because it has less bulk.

marking the seamline on  the sleeve facing

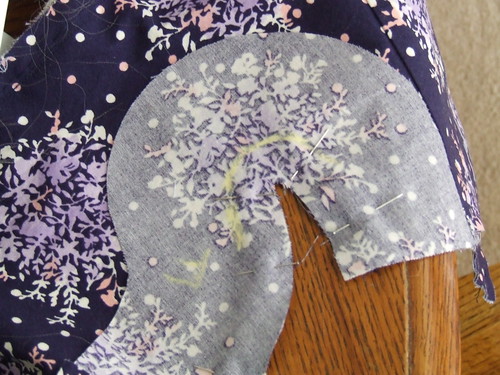
Next, I added the sleeve facing. Finding the stitching line along the tight curve was difficult, so I marked it out ahead of time with tailor's chalk.

sleeve stabilization

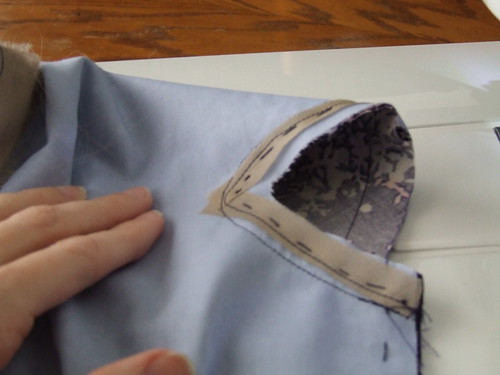
As you can see, the 5/8" seam generally went outside of the 1/2" bias silk organza strips I used for stabilization, so I will definitely make wider strips next time.

I then graded the sleeve seam allowances, clipped and notched the curves, pressed the facing under, and hand sewed the facing to the seam allowances to keep it from flipping out. I also pinked the outside edge of the facings.

Next, I sewed the side seams with the sleeve facing flipped up, so that when I flipped the facing down, all of the seams were finished. This seam was also pinked. Then the sleeve facings were flipped back down and tacked by hand to the seam allowances at the shoulder and side seam under the arms to keep them in place. Unfortunately, the facing still doesn't want to play nice at the tight curves where the sleeves transition to the body of the dress. I just read that Gertie had the same problem and she sewed them down to the underlining, which I will be doing today.

Next, I sewed tubes from the contrasting tie fabric and flipped them right side out. I then pinned them to the dress and tried it on to see how long I wanted them. I ended up not trimming them to the length in the pattern but leaving them as-is because I liked the extra length. I then basted them to the back of the bodice, giving the current state of the dress here:

Crepe bodice progress

The next step will finish the bodice, then I'll move on to the skirt. How long will it take me to finish? What are your bets?

Tuesday, March 1, 2011

Crepe Sew Along 5: Ready to Sew

Crepe sew along ready for sewing

Today, I finally got to the point when I have everything set up on Gertie's "pre-sew checklist".

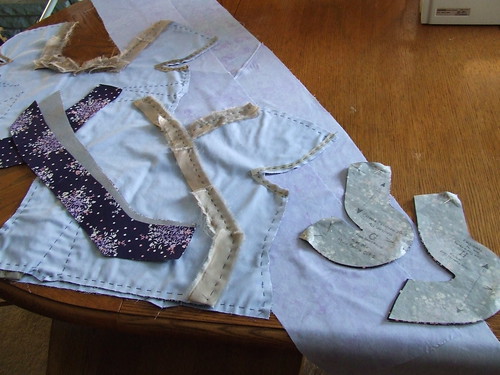
I used the silk organza strip method to stabilize the neckline, then tried the silk bias strips for the arms, like Gertie. You can see the tan strips that I hand basted at these openings. Remember, the light blue is my underlining, and the dark purple is the dress fabric. I think I prefer the bias strips, but maybe they should be wider. We'll see.

Next, I redrafted all of the facings to match my alterations. Then, I fused lightweight interfacing to the neckline facings. I had to go out to the fabric store to pick up the interfacing because I thought the organza replaced the need for interfacing. Oops! Well, it was a good excuse to drop by Haberman Fabrics on the way to pick Scott up at work when his car was out of commission. It's probably a good thing that I had to get him because all the wool fabrics were 40% off. As much as I might want to, I can't go and splurge for a new dress when I haven't even finished this one.

I also cut out my sash, which is made of a lovely batik fabric from Material Girls Quilts. Unfortunately, the amount of fabric I bought was not enough to cut the sash as a single piece, so I cut strips and spliced them together at an angle. I decided not to trim the final strip to length just yet, because I tend to like long ties.

It was nice to actually get my machine out for this. I am pretty tired of hand basting, even if it does keep the fabric lined up better. Plus, I am so enamored with my new machine. It's a joy to use.

Up next: sewing.

Thursday, February 24, 2011

Crepe Sew Along 4: Underlining and cutting

Crepe and cat

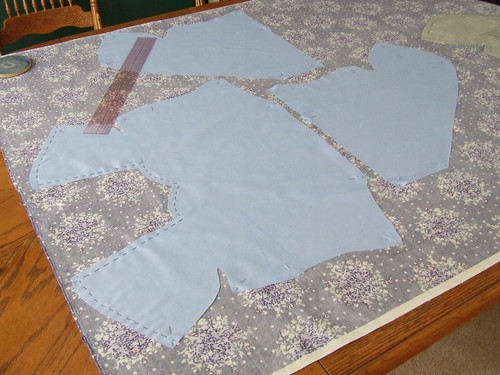
Last week, I cut out underlining for the bodice and skirt pieces of my Crepe dress, and marked the right side of the interlining using dressmaker's tracing paper. I traced all of the darts and dots. Then I basted those pieces to the back side of my main fabric. I started with the bodice, taking care to position it so that the flowers weren't *ahem* inappropriately placed. I also tried to make sure that my skirt pieces lined up so that the flowers wouldn't be offset vertically, even if I couldn't really figure out how to match the pattern at the front seam, which was my goal.

basting interlining

All of the pieces needed to be hand-basted for the most accuracy, according to Gertie, so this took me a while. The basting is about 1/2" from the edge of the fabric, so when I sew the pieces together, it will be within the 5/8" seam allowance. I finished up basting and cutting the last pieces today.

The underlining, sometimes called interlining, allows the dress to be less see-through, and is also providing me with a prettier garment interior. From here on out, I treat these two layers as one piece of fabric, unlike lining, which hangs free. See Gertie's post for more information.

As you can see, Hoser seems to really like it when I sew. He decided that my Japanese cotton print was really intended to be his new cat bed.

Friday, February 11, 2011

Crepe Sew Along 3: Fitting the Muslin

As you may have guessed by my silence on the topic, I have totally neglected the Crepe Sew Along. Now that Gertie has completed her posts, I am finally catching up.

I will admit that I was totally intimidated by actually tackling fitting, especially doing it by myself, and I was reluctant to ask Scott to assist me with it. Sadly, when I did try to get some help from him the other day, that feeling didn't alleviate. One thing that helped tremendously was the book Fit for Real People. After my first muslin experience and the feedback I received, I decided to try going down a size. As the book recommended, I did a tissue fitting first. I made an adjustment to the pattern for a rounded back and for sloped shoulders, plus I added a little full bust adjustment because the finished size gave me no wearing ease. With these adjustments already completed, I made a muslin. The back was good, but the front was not quite on yet.
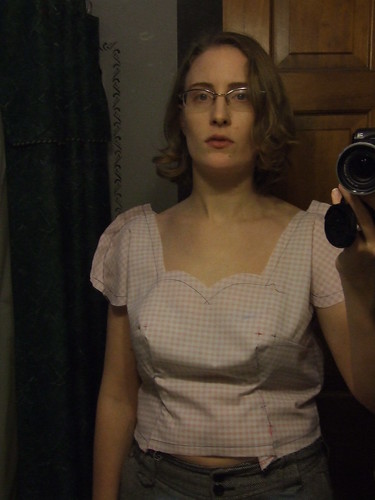
Size 6 with back & shoulder adjustments

After adjusting the shape of the darts, I got rid of some of that extra fabric.

adjusted darts

After that, I pinned out some excess fabric on the sides, but I don't have any good photos of that. With a little adjustment of the sleeve shape, that took care of it. Here is the marked up muslin.
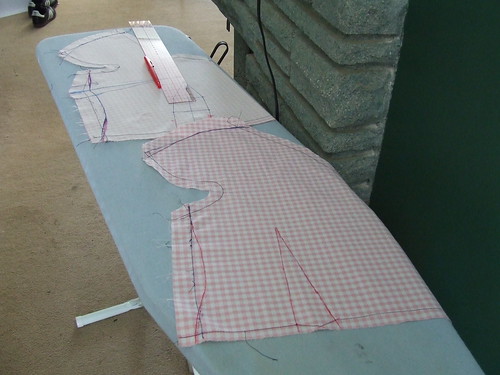
marked-up muslin

I traced all of the new marks. Yes, those are tuna cans that I'm using as pattern weights. They work great, they're not too tall, and they're already in the house.
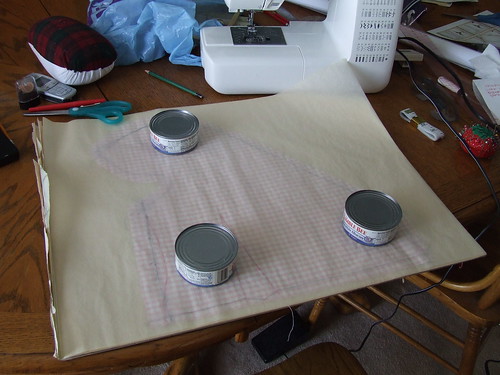
tracing a new pattern

Clean new pattern fitted to me:

New pattern pieces post fitting

Once that was done, I moved to the next step, which I realized I could have done first! Since I had not pre-treated the fabric, I couldn't continue to cutting yet.
Preparing the fabric for pretreating

I stitched a zig-zag on all of the cut edges of my fabrics and tossed it in the machine on "hand wash", since that's what may happen to the dress if I am feeling a little lazy about hand washing. After all, it's cotton, not wool, mohair, or anything else prone to felting, nor is it lace. At the moment, I am waiting for the washer before I can continue.

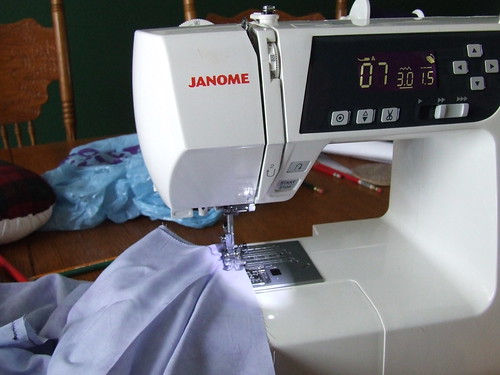
The other thing I must point out is my beautiful new Janome 3160 QDC. I love it! A big thank you to my parents and my grandmother for this Christmas/birthday gift. It sews beautifully - miles above my old machine. Plus, it has many more stitches, from blind hem, to stretch, to automatic button holes and even a few totally decorative stitches with no specific structural use. (I say that because some of the special stitches are decorative even if they're meant to to something else, like smocking, faggoting, or shell edges.) Additionally, some of the other little things are very nice additions that make sewing easier, for example: a needle-threader. The bobbin is also considerably easier to put in, and what is more, it is easy to make sure you put it in right because there is a little diagram right there. The automatic thread cutter was not something I expected to use much, but I actually love it because I don't have to pull out big tails at the beginning of every seam because it holds the cut bobbin thread in place. Genius.
Friday, December 17, 2010

Crepe Sew Along, Week 2: Sewing the Muslin

Sorry I haven't posted this week.  It isn't because I have done nothing or have nothing to show -- I just haven't taken the time to post.

One thing I did this week was to sew the muslin for the Crepe.

Here it is:

Crepe muslin

Crepe muslin

Crepe muslin

As you can see, the fit needs a bit of work.  I can actually tighten it a bit more if I let it ride up a bit:

Crepe muslin pulled tight

I think that helps show just how much extra fabric there really is beneath the bust.  I haven't gotten to altering it, though.  I waited a while for the post about sewing it and this week I have been swamped with shopping.  Bleh.

There is extra fabric above and below the bust, the darts are a bit high.  I can actually move the bust area to the right spot, but then the shoulder seams are too far forward.  I may want to go down a size and add a full bust adjustment rather than simply changing the position and shape of the darts, but I fear that the sleeve will be restrictive if I do.  I fear there will be several more runs of muslin making in the next week or so.  I think I need some assistance in pinning things out first, though.

Monday, December 6, 2010

Crepe Sew Along, Day 1: Cutting Out the Muslin

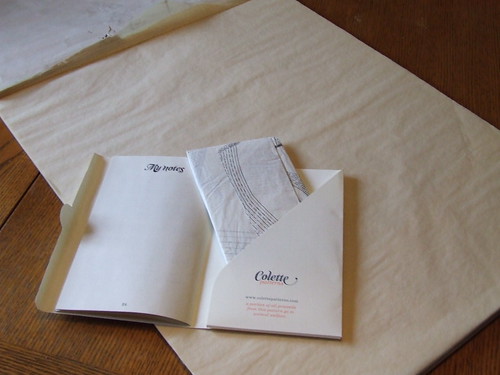
Colette Pattern

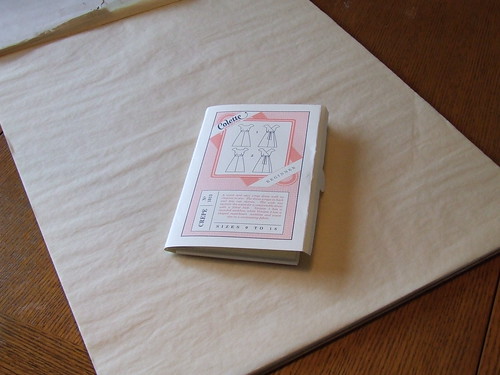
Today was the first day of the Crepe Sew Along, and I jumped off the starting line. My pattern had arrived from Colette Patterns on Saturday, and the pattern itself is very nice.

Colette Patten

The pattern envelope is more like a booklet with a back pocket for the pattern itself. It also contains a full set of instructions and a glossary, plus a spot to write personal notes. The pattern also included sizes 0-18, and the sizes are pretty close to ready-to-wear sizes, rather than typical pattern sizing. I don't like to cut into my patterns any more, especially expensive ones; I prefer to trace the size I want onto some spare artist's tracing paper I have and then use that pattern on the fabric itself. One reason I do this is because I sometimes make mistakes about which size I should cut out. Also, a lot of fitting techniques involve cutting up your pattern, and I believe I will feel much more comfortable doing this on a traced part than the original. Plus, I can't loose the small pieces.
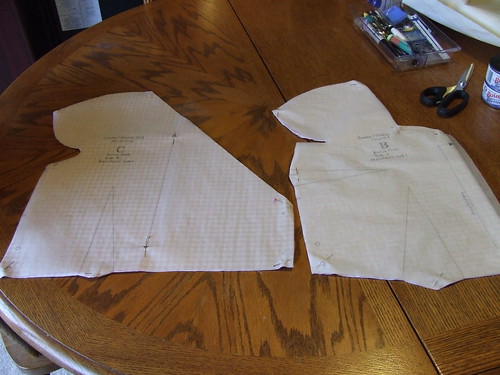
Muslin cut out - Crepe Sew Along

For my muslin, I used an old pink gingham sheet that was used for padding when I moved. This was my first time using dressmakers' tracing paper and a tracing wheel, which is pretty neat. I have always been reluctant to transfer markings, because I wasn't really sure what I was supposed to be doing. On my last project, I marked with thread, which worked well, but this was so much quicker.

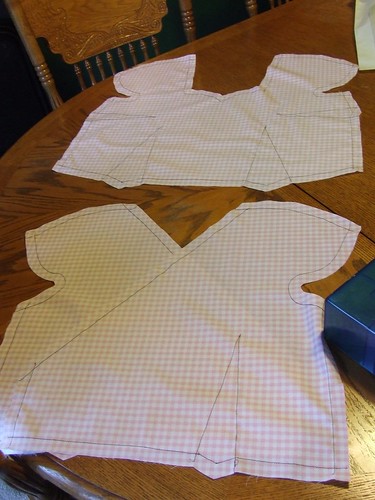
Thread traced muslin - Crepe Sew Along

Once the pattern was cut out and the markings were transferred, I did as Gertie directed and stitched along the seam lines so that I will be able to see where things will end when I do my fitting. In retrospect, I probably didn't need to stitch along the darts, but I just read wrong. Also, we are only making a muslin of the bodice, since the skirt is flared.

I'm all ready for step 2!

Sunday, December 5, 2010

Crepe Sew Along

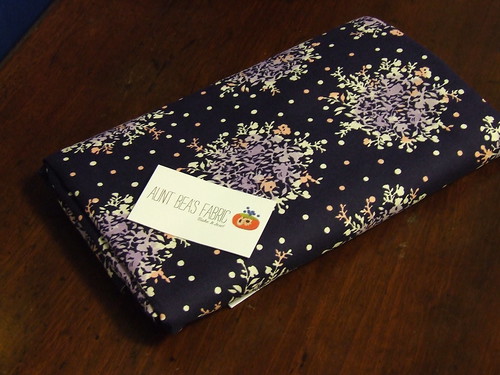
Crepe Sew Along Fabric

Yesterday, the fabric arrived for the Crepe dress that I will be sewing as part of the sew along on Gertie's New Blog for Better Sewing, which I mentioned back in mid November. I did complete both of my in-progress sewing projects and the next one I had planned to sew before the end of the month, thus meeting my self-proscribed prerequisites for joining the sew-along. I made a silk sash, refashioned a t-shirt, and made a steampunk bustle, finishing the third project on Monday.

Tuesday, I went to Haberman Fabrics in Royal Oak, which I had heard has a reputation for good garment fabric selection. Boy do they ever! I have never been in such a nice store for garment sewing, with a huge selection of natural fibers and some of the fabric made specifically for high end ready-to-wear. Unfortunately, since it is cold weather here in Michigan, they had put away or not re-ordered much of their selection of cotton prints. Plus, I had really set my sights on several that I found at Aunt Bea's Fabric, thanks to the sew-along promotion, and anything I bought locally needed to match up to those gorgeous Japanese prints. I had narrowed it down to three, and I ended up ordering one from there. I am very pleased with the fabric, though the background is not as purple as I thought from the on-screen preview image. Now I just need to get the lining and notions.

Tuesday, November 23, 2010

Home updates

So, here's an update on some of the things I accomplished last week.

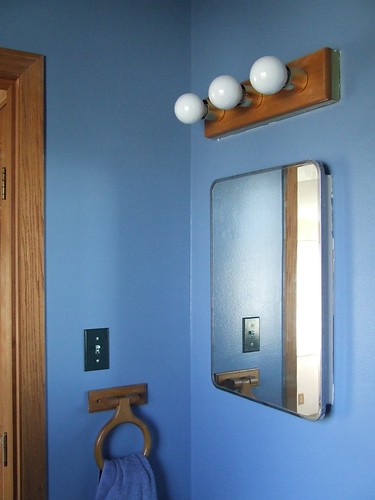
Cat Bathroom Painted Blue

I finished painting the walls blue in the half bath. We still need to fix the ceiling and touch up the edges in some of the places where the masking tape didn't behave.

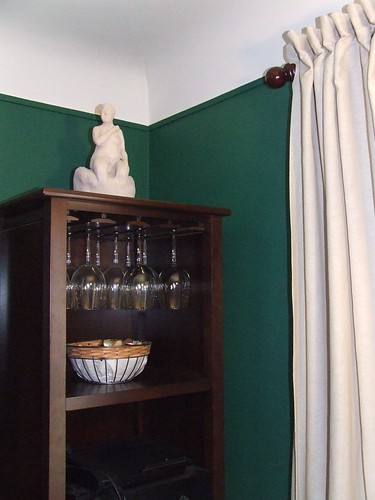
Living Room Curtains

We also installed curtains in the living room in lieu of the vertical blinds that I hate so much. This was the best photo I could get at the moment with the sun shining in so brightly. I bought these curtains at IKEA, but they were tab-top, and I wanted to create a clean line from the cove ceiling to make the toom look taller, rather than showing a band of green at the top. On the other hand, I liked the regular folds that the tabs created, rather than the random bunching you get with a channel. So I just folded the interfaced top portion down to the back side, pressed and sewed along the former top edge, sewed the tabs down, then threaded the curtain rod through the tabs. VoilĂ !

Creating this IKEA hack and hemming the curtains was the first thing I have sewn since I mentioned completing sewing projects this month in order to join in the Crepe Sew-Along. My sewing machine was being frustrating, as usual, in failing to maintain its tension and going crazy on the back side of the seam. I ended up using Scott's machine instead, and I like it a lot better. It is a tiny travel machine, but it isn't finicky, and it sews reliably. I also like its case, which includes special places to store thread, bobbins, and other accessories, plus half of the case can be attached to the machine as an extension table. Still, it really is small. I had trouble lifting the foot over the curtain hems at the edges, because there wasn't enough vertical play. The 6" hem was already rising up the vertical because the arm wasn't long enough to lay it flat. Plus, the stitch-type selector dial is not functioning, so it is limited to being a straight-stitch machine, though it is supposed to have a variety of useful stitches available. At any rate, it is still preferable to my mis-behaving machine, and I will be using it for all of the projects I will be tackling this week.

I did go into my stash and decided that it was silly for me to keep some of the projects that I had tried to rescue due to fit issues, etc. Others should be on their way soon, with proper use of muslins.