Thursday, February 24, 2011

Crepe Sew Along 4: Underlining and cutting

Crepe and cat

Last week, I cut out underlining for the bodice and skirt pieces of my Crepe dress, and marked the right side of the interlining using dressmaker's tracing paper. I traced all of the darts and dots. Then I basted those pieces to the back side of my main fabric. I started with the bodice, taking care to position it so that the flowers weren't *ahem* inappropriately placed. I also tried to make sure that my skirt pieces lined up so that the flowers wouldn't be offset vertically, even if I couldn't really figure out how to match the pattern at the front seam, which was my goal.

basting interlining

All of the pieces needed to be hand-basted for the most accuracy, according to Gertie, so this took me a while. The basting is about 1/2" from the edge of the fabric, so when I sew the pieces together, it will be within the 5/8" seam allowance. I finished up basting and cutting the last pieces today.

The underlining, sometimes called interlining, allows the dress to be less see-through, and is also providing me with a prettier garment interior. From here on out, I treat these two layers as one piece of fabric, unlike lining, which hangs free. See Gertie's post for more information.

As you can see, Hoser seems to really like it when I sew. He decided that my Japanese cotton print was really intended to be his new cat bed.

Friday, February 11, 2011

Crepe Sew Along 3: Fitting the Muslin

As you may have guessed by my silence on the topic, I have totally neglected the Crepe Sew Along. Now that Gertie has completed her posts, I am finally catching up.

I will admit that I was totally intimidated by actually tackling fitting, especially doing it by myself, and I was reluctant to ask Scott to assist me with it. Sadly, when I did try to get some help from him the other day, that feeling didn't alleviate. One thing that helped tremendously was the book Fit for Real People. After my first muslin experience and the feedback I received, I decided to try going down a size. As the book recommended, I did a tissue fitting first. I made an adjustment to the pattern for a rounded back and for sloped shoulders, plus I added a little full bust adjustment because the finished size gave me no wearing ease. With these adjustments already completed, I made a muslin. The back was good, but the front was not quite on yet.

Size 6 with back & shoulder adjustments

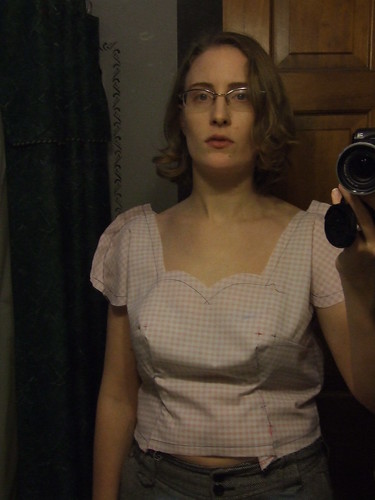
After adjusting the shape of the darts, I got rid of some of that extra fabric.

adjusted darts

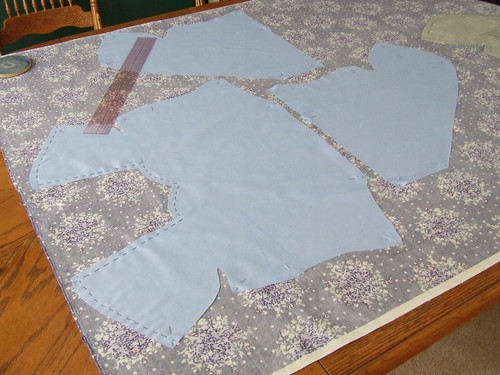
After that, I pinned out some excess fabric on the sides, but I don't have any good photos of that. With a little adjustment of the sleeve shape, that took care of it. Here is the marked up muslin.

marked-up muslin

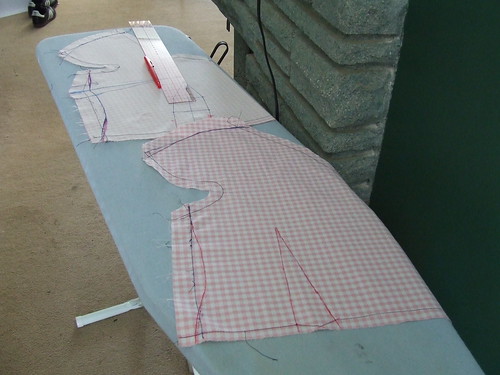
I traced all of the new marks. Yes, those are tuna cans that I'm using as pattern weights. They work great, they're not too tall, and they're already in the house.

tracing a new pattern

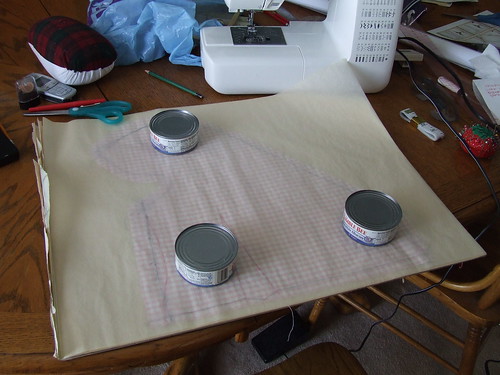
Clean new pattern fitted to me:

New pattern pieces post fitting

Once that was done, I moved to the next step, which I realized I could have done first! Since I had not pre-treated the fabric, I couldn't continue to cutting yet.

Preparing the fabric for pretreating

I stitched a zig-zag on all of the cut edges of my fabrics and tossed it in the machine on "hand wash", since that's what may happen to the dress if I am feeling a little lazy about hand washing. After all, it's cotton, not wool, mohair, or anything else prone to felting, nor is it lace. At the moment, I am waiting for the washer before I can continue.

The other thing I must point out is my beautiful new Janome 3160 QDC. I love it! A big thank you to my parents and my grandmother for this Christmas/birthday gift. It sews beautifully - miles above my old machine. Plus, it has many more stitches, from blind hem, to stretch, to automatic button holes and even a few totally decorative stitches with no specific structural use. (I say that because some of the special stitches are decorative even if they're meant to to something else, like smocking, faggoting, or shell edges.) Additionally, some of the other little things are very nice additions that make sewing easier, for example: a needle-threader. The bobbin is also considerably easier to put in, and what is more, it is easy to make sure you put it in right because there is a little diagram right there. The automatic thread cutter was not something I expected to use much, but I actually love it because I don't have to pull out big tails at the beginning of every seam because it holds the cut bobbin thread in place. Genius.

Saturday, February 5, 2011

Belle Isle, Shiver on the River

Belle Isle Aquarium & Conservatory

Today, while Scott played in a Malifaux tournament, I braved the snowfall and went to Belle Isle for the annual Shiver on the River event. They had the aquarium open for the event, which was special because it has been closed since 2005.

Belle Isle Aquarium

Designed by Albert Kahn, built in 1904.

Belle Isle Aquarium

Most of the tanks are empty, though the Friends of Belle Isle Aquarium are trying to change that and raise money to get it reopened. It was the first public aquarium in the US, and there is currently no aquarium at all in the area.

Belle Isle Aquarium

For now, the only full tank is being used to house the outdoor fountain's koi for the winter.

Belle Isle Conservatory

Attached to the aquarium, but separate, is the conservatory, also designed by Albert Kahn. The conservatory is free and normally open from Wednesday-Sunday every week.

Belle Isle Conservatory

The main dome is a palm room, with wings to three sides.

Belle Isle Conservatory

Here is the fern room, which is attached to the desert area in the north wing.

Belle Isle Conservatory

In the south wing, orange trees were bearing fruit.

Belle Isle

Stables across the road are currently used as maintenance facilities.

Belle Isle Bell Tower

The carrilon tower tolled the hour as I left the conservatory.

Belle Isle Athletics Shelter

I got a bit confused by the one-way streets, and took the long way around by the 1898 athletic field house. There is apparently a restaurant there, which must be open in the summer months.

Belle Isle Casino, 1907

I went around to the casino (which is not actually a place to gamble -- at the time it was built, casino just meant a place to gather), where they were having a little carnival. Unfortunately, I was a bit late, so I missed most of it.

skylight inside Belle Isle Casino

I did get to see some of the lovely 1907 period details designed by Van Leyen & Schilling, like the mosaic floor, and this stained glass skylight.

6 day old kids

There were, however, some six day old kids there, which I got to pet and snuggle, and I carried one out to the lady's car for her.